You’ve been staring at FL Studio for hours, knowing there’s a fire trap beat locked inside your head, but somehow it never translates to your DAW. The hi-hats sound lifeless, your 808s lack punch, and that signature trap bounce feels more like a stumble. Trust me, I’ve been there and so has every producer who’s now dropping beats that make speakers rattle.
Here’s the thing about trap music beats: they’re deceptively simple on the surface but require understanding specific sonic elements and arrangement techniques that most tutorials gloss over. After producing trap beats for over 8 years and studying the patterns behind chart-toppers from Metro Boomin to Southside, I’m going to break down exactly how to craft trap beats that actually hit different.
Whether you’re producing traditional trap or exploring newer subgenres like opium type beats, the fundamentals I’ll teach you apply across all trap variations.
What Are Trap Music Beats? (And Why Most People Get It Wrong)
Trap music beats originated in the early 2000s Atlanta hip-hop scene, characterized by aggressive lyrical content over hard-hitting, minimalist instrumentals. The term “trap” refers to places where drugs are sold, but musically, it’s evolved into one of the most influential genres across hip-hop, pop, and electronic music.
Core Elements That Define Trap Beats:
Tempo Range: 130-170 BPM (most commonly 140-150 BPM) Time Signature: 4/4 with heavy emphasis on syncopated rhythms Key Components:
- Booming 808 sub-bass
- Crisp, rapid-fire hi-hats (often 32nd notes)
- Snappy snare drums (usually on beats 2 and 4)
- Dark, atmospheric melodies
- Sparse arrangement with strategic drops and fills
The biggest mistake beginners make? They focus on adding too many elements instead of perfecting the essential ones. Trap is about space, impact, and groove – not complexity.
Setting Up Your FL Studio Workspace for Trap Production
Before we dive into beat creation, ensure your audio setup is optimized. If you haven’t already, learn how to set ASIO as your audio driver in FL Studio for the lowest latency possible. You’ll also want to master recording audio in FL Studio for capturing your own samples and MIDI recording techniques for programming melodies.
Essential FL Studio Tools for Trap:
Built-in Plugins You’ll Use Most:
- Serum or 3xOsc for 808s and bass
- FPC or Battery for drum samples
- Parametric EQ 2 for shaping frequencies
- Fruity Limiter for compression and limiting
- Reverb 2 and Delay 3 for atmospheric effects
Optimizing Your Project Template:
Create a trap-specific template with these mixer tracks pre-loaded:
- 808/Sub Bass (Track 1)
- Kick (Track 2)
- Snare (Track 3)
- Hi-Hats (Track 4)
- Open Hi-Hats (Track 5)
- Melody/Lead (Track 6-8)
- Pads/Atmosphere (Track 9-10)
- Master Bus with basic processing chain
Pro tip: Set your project tempo to 140 BPM by default it’s the sweet spot for most trap beats and makes it easier to layer different rhythmic elements.
The Foundation: Building Your Drum Pattern
The drum pattern is the heartbeat of trap music beats. Get this wrong, and nothing else matters.
Step 1: Programming the Basic Kick and Snare
Start with this fundamental pattern:
- Kick: Beats 1 and 3 (sometimes just beat 1)
- Snare: Beats 2 and 4 (the backbeat)
In FL Studio’s Step Sequencer:
- Load a punchy kick sample (around 60-80Hz fundamental frequency)
- Place kicks on steps 1 and 9 (if using 16-step mode)
- Add snare hits on steps 5 and 13
- Keep velocity at 100% for consistency
Step 2: Creating the Signature Hi-Hat Pattern
This is where trap beats get their distinctive energy. The key is layering different hi-hat sounds:
Closed Hi-Hats (32nd note pattern):
- Create rolling patterns using steps 1, 3, 6, 8, 10, 12, 14, 16
- Vary velocities between 60-90% for human feel
- Use slight timing offsets (+/- 5-10 milliseconds)
Open Hi-Hats (accent pattern):
- Place on off-beats for rhythmic tension
- Lower velocity (40-60%) for subtlety
- Add slight reverb for space
Step 3: Advanced Hi-Hat Techniques
The difference between amateur and professional trap beats often lies in hi-hat programming:
Triplet Rolls: Program 3 hi-hats in the space of 2 for that signature “rolling” effect
Ghost Notes: Add very quiet hi-hats (20-30% velocity) between main hits
Pitch Variations: Slightly detune alternate hi-hats (+/- 10-20 cents)
Velocity Randomization: Use FL Studio’s built-in tools to randomize velocity patterns for more human-feeling rhythms.
Crafting the Perfect 808 Bass Line
The 808 is the soul of trap music beats. It provides both rhythmic foundation and melodic movement.
Selecting the Right 808 Sample
Not all 808s are created equal. Look for samples with:
- Clean low-end (30-60Hz range)
- Sufficient sustain (2-4 seconds minimum)
- Harmonically rich overtones for character
Programming 808 Patterns in FL Studio
Basic Pattern Structure:
- Root note on beat 1 – establish the key
- Rhythmic hits on off-beats – create groove
- Melodic movement – typically 3-5 different notes max
FL Studio 808 Programming Tips:
- Use the Piano Roll for precise timing and pitch
- Set glide/portamento to 100-200ms for smooth note transitions
- Layer a sine wave sub at -12dB for extra low-end weight
- Apply slight saturation (5-10%) for harmonic content
808 Processing Chain
Your 808 processing should enhance, not overwhelm:
- EQ: High-pass at 30Hz, slight boost at 60-80Hz
- Compression: Slow attack (10-30ms), medium release
- Saturation: Subtle tube or tape saturation
- Limiting: Catch peaks without squashing dynamics
Pro tip: To make your 808s really punch through dense mixes, learn how to properly sidechain compress in FL Studio. This technique ducks other elements when your 808 hits, creating that professional trap sound you hear on major releases.
Melody and Harmony: Creating Dark Atmospheric Sounds
Trap melodies often use minor scales and dissonant intervals to create tension and darkness.
Recommended Scales for Trap:
Natural Minor Scale: The foundation of most trap melodies Harmonic Minor: Adds exotic, Middle Eastern flavor Dorian Mode: Popular in modern trap for its unique character Pentatonic Minor: Simplified approach for catchy hooks
Instrumentation Choices
Lead Sounds:
- Plucked strings (guitar, harp samples)
- Dark piano with heavy reverb
- Synthesizer leads with saw or square waves
- Orchestral strings for dramatic effect
Sound Design Tips:
- Filter cutoff automation for movement
- Delay throws on melody endings
- Pitch bend for expressive phrases
- Layering different octaves for fullness
Chord Progressions That Work
Most effective trap progressions use 2-4 chords:
- i – VI – III – VII (Am – F – C – G in A minor)
- i – iv – i – v (Am – Dm – Am – Em in A minor)
- i – VI – iv – V (Am – F – Dm – E in A minor)
Keep progressions simple – trap is about groove and atmosphere, not complex harmony.
Advanced FL Studio Techniques for Professional Trap Beats
Automation for Dynamic Interest
Static beats kill energy. Here’s how to add movement:
Volume Automation:
- Automate hi-hat volume to create build-ups
- Duck melodic elements during vocal sections
- Create filter sweeps on synth pads
Pan Automation:
- Subtle left-right movement on percussion elements
- Wide stereo image for atmospheric sounds
- Center focus for bass and kick elements
Using FL Studio’s Unique Features
Lifetime Free Updates Advantage: FL Studio’s pattern-based workflow is perfect for trap production:
- Pattern Blocks: Create 8-bar sections for easy arrangement
- Ghost Channels: Reference other patterns while editing
- Playlist Automation: Automate effects across entire song sections
Performance Mode: Use FL Studio’s Performance mode for live beat creation and jamming.
Mixing Your Trap Beat
Professional trap beats cut through any sound system. Here’s the mixing approach:
Frequency Separation:
- Sub-bass (20-60Hz): 808s only
- Bass (60-200Hz): 808s + kick fundamental
- Low-mids (200-500Hz): Snare body, careful not to muddy
- Mids (500Hz-2kHz): Melody elements, snare crack
- High-mids (2-8kHz): Hi-hats, vocal presence
- Highs (8kHz+): Hi-hat sizzle, air, atmosphere
Compression Strategy:
- Individual track compression: Control dynamics
- Bus compression: Glue elements together
- Parallel compression: Add punch without losing transients
Arrangement and Song Structure
Most trap beats use standard 4/4 time, but don’t be afraid to experiment. Learning how to change time signatures in FL Studio can add unique flavor to your beats and help you stand out from the crowd.
Trap beats follow predictable but effective structures:
Standard Trap Beat Structure (3-4 minutes):
- Intro (8-16 bars): Build anticipation
- Verse (16-32 bars): Minimal arrangement, focus on groove
- Chorus/Hook (8-16 bars): Full arrangement, maximum energy
- Verse 2 (16-32 bars): Slight variations from first verse
- Chorus/Hook (8-16 bars): Repeat or variation
- Bridge/Breakdown (8-16 bars): Strip back, create tension
- Final Chorus (8-16 bars): Maximum impact
- Outro (8-16 bars): Resolve and fade
Creating Effective Transitions
Build-ups: Increase hi-hat frequency, add filter sweeps Drops: Remove elements then bring back with impact Fills: Snare rolls, cymbal crashes, vocal chops
Common Mistakes and How to Avoid Them
Mistake #1: Overcomplicating the Pattern
Solution: Start with kick, snare, hi-hats. Add elements only if they serve the groove.
Mistake #2: Weak 808 Selection
Solution: Spend time finding quality 808 samples. Consider purchasing professional sample packs.
Mistake #3: Ignoring the Mix
Solution: Mix as you go. A well-mixed simple beat beats a complex muddy one every time.
Mistake #4: Not Leaving Space for Vocals
Solution: Arrange your beat with vocal sections in mind. Less is more when vocals are present.
Mistake #5: Copying Instead of Learning
Solution: Analyze your favorite trap beats, but understand why they work instead of just copying patterns.
Essential Resources and Next Steps
Recommended Sample Packs:
- Lex Luger Kit: Classic trap sounds
- Metro Boomin Drumkit: Modern trap staples
- Southside 808 Mafia Kit: Hard-hitting drums
- Pierre Bourne Type Sounds: Melodic trap elements
FL Studio Plugins Worth Investing In:
- Omnisphere: Unlimited sound design possibilities
- Nexus: Quick, professional presets
- Gross Beat: Unique rhythm effects
- Harmor: Advanced synthesis capabilities
Practice Routine for Improvement:
Week 1-2: Master basic drum patterns and 808 programming Week 3-4: Focus on melody creation and harmony Week 5-6: Learn mixing and arrangement techniques Week 7-8: Study and recreate professional trap beats Ongoing: Create original beats daily, seek feedback from other producers
Your Path Forward in Trap Production
Creating professional trap music beats isn’t about having the most expensive gear or knowing every plugin. It’s about understanding the fundamental elements that make trap beats work and having the patience to perfect your craft through consistent practice.
Start with the basics I’ve outlined here. Master one element at a time instead of trying to do everything at once. Your first beats won’t sound like Metro Boomin, and that’s perfectly fine even he had to start somewhere.
The trap production community is surprisingly supportive. Join forums, Discord servers, and social media groups where producers share knowledge and feedback. Collaboration often leads to breakthrough moments in your development.
Most importantly, remember that trap music beats are meant to be felt as much as heard. If your beat doesn’t make you want to move, it probably won’t move anyone else either. Trust your instincts, keep your ears open to new sounds and never stop experimenting.
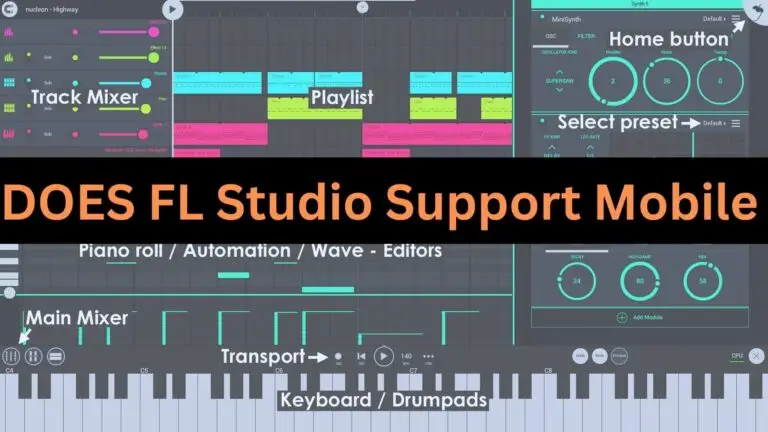
Remember, consistency is key in developing your skills. Practice daily, even if it’s just 15 minutes on FL Studio Mobile during your commute. Every bit of practice counts toward mastering your craft.
Your signature trap sound is waiting to be discovered now you have the roadmap to find it.

